At the time of installing the Integration App, in the first installation step (Configure NetSuite Account Credentials) it is mandatory to set up the Integration App with Authentication Type as Basic as of yet. This restriction will be lifted off in future releases. Once the Integration App has been successfully installed on your integrator.io account, you can go to the Connections option, locate the NetSuite Connection and click the Edit icon to change the connection from Basic to Token-Based Authentication (TBA).
NetSuite pre-requisites to establish the TBA connection
1. Enable TOKEN-BASED AUTHENTICATION setting in NetSuite
Enable Token-Based Authentication in your NetSuite environment by browsing to Setup > Company > Enable Features and click the SuiteCloud subtab. Now scroll down to the Manage Authentication section and check the box next to TOKEN-BASED AUTHENTICATION.
2. Assign permission for the role in NetSuite
You'll either need to modify an existing role or create a new role in NetSuite (Setup > Users/Roles > Manage Roles > New) with the following permissions:
- Under Permissions > Transactions:
Find Transaction
Full
Invoice
Full
Item Fulfillment
Full
Opportunity
Full
Estimate
Full
Sales Order
Full
Track Time
Full
- Under Permissions > Lists:
Cases
Full
Contacts
Full
Currency
Full
Customers
Full
Custom Record Entries
Full
Documents and Files
Full
Employee Navigation
Full
Employee Search
Allowed
Employees
Full
Items
Full
Track Messages
Full
- Under Permissions > Setup:
Custom Fields
Full
Custom Lists
Full
Custom Record Types
Full
SuiteBundler
Full
SuiteBundler Audit Trail
Full
SuiteScript
Full
User Access Tokens
Full
Users & Passwords
Full
Web Services
Full
3. Assign the role with permission to an account
Assign the role with all necessary permission to an Employee account you want to use for the token based connection. Edit the Employee Record (Setup > Users/Roles > Manage Users), browse to the Access > Roles Subtab. Add the role to the account and Save the changes. In the following image, Celigo IO Integration Admin is the new role with all permission that can be considered to be added to the account using which you want to configure your NetSuite connection pertaining to the Integration App.

One the employee record is saved, Log out from the NetSuite and log in again with the employee account for which you added the role with all required permissions.
Steps to generate Token ID and Token Secret in NetSuite
Use the following steps in NetSuite to generate Token ID and Token Secret in NetSuite that can be used in a Integration App to establish a token based connection between NetSuite and Integration App:
1. In the NetSuite global search box, enter access token. 
2. From the search results select Page: New Access Token. The Access Token page is displayed.
3. Select eTail Connectors (Token-Based Auth) from the APPLICATION NAME drop-down list.
4. Select the desired user from the User drop-down list.
5. Select the role with all required permissions from the Role drop-down list.
6. Click Save. The confirmation page is displayed with TOKEN ID and TOKEN SECRET.

Make a note of TOKEN ID and TOKEN SECRET.
Changing your connection from Basic to Token in the Integration App
Use the following steps in your integrator.io account to change the connection type from basic to token:
1. Click on the Settings gear icon in the Integration App tile.
2. Click Connections. The connection page is displayed.
3. Click the Edit icon next to the NetSuite Connection. The Connection dialog box is displayed.
4. Change the Authentication Type drop-down list value from Basic to Token (Automatic or Manual).
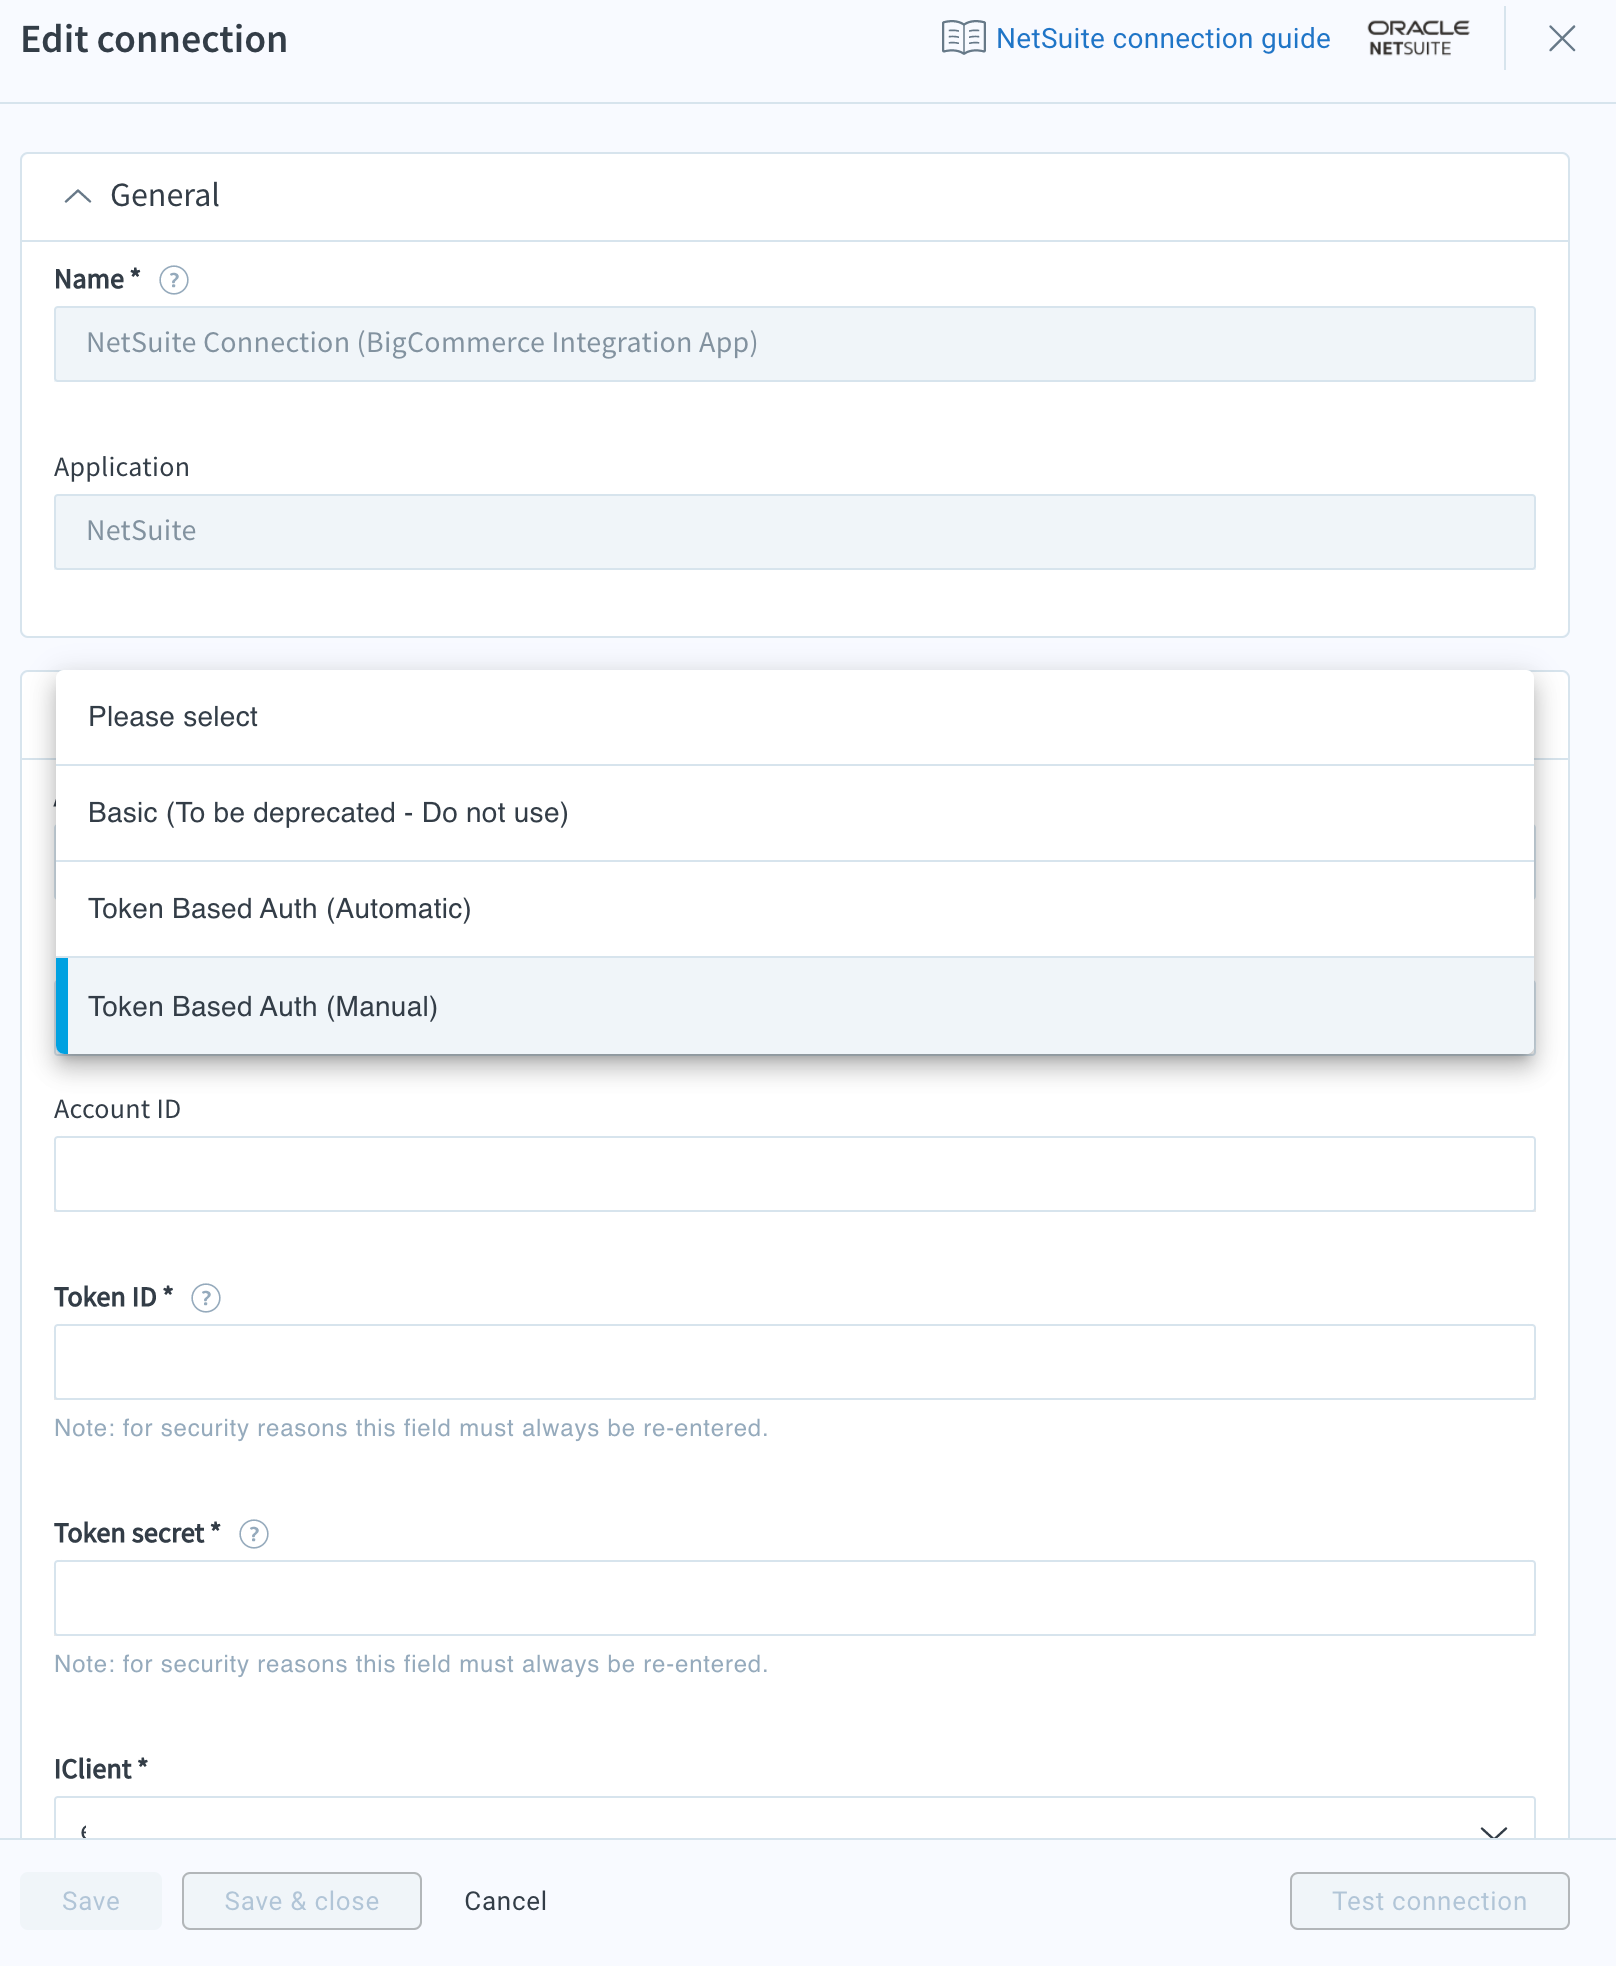
5. Enter the information in the new field displayed upon selecting Authentication Type as Token.
Note: You can copy and paste the Token Id and Token Secret noted in the previous section in the respective fields.
6. Click Test to ensure your NetSuite credentials are correct before saving the record.
7. Once your credentials are successfully verified, click Save.