The pre-built data flow comes with pre-mapped fields. If you need to map additional fields, you can edit the mappings to add additional fields (or modify existing fields) from the 'Field Mapping' section in Integrator.io.
View of the pre-mapped fields.
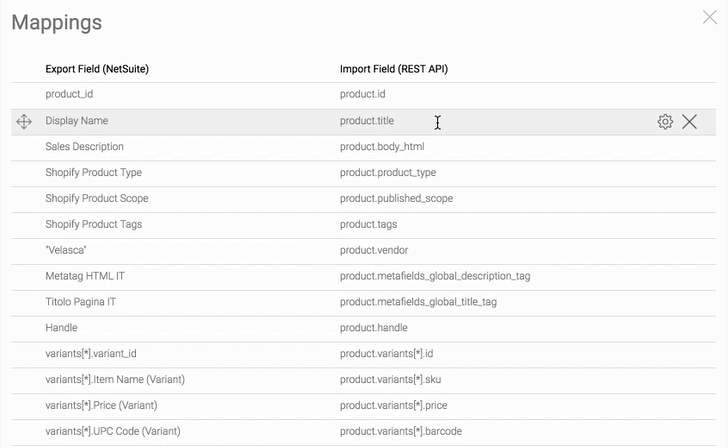
If you need to map additional fields, you can edit the mappings to add additional fields (or modify existing fields) from the 'Field Mapping' section in Integrator.io.
First, create the field in NetSuite. Navigate to the respective Saved Search in NetSuite for the Item Export flow. The saved search will be prefixed with 'Celigo Shopify Item Export [Store Name] Item.
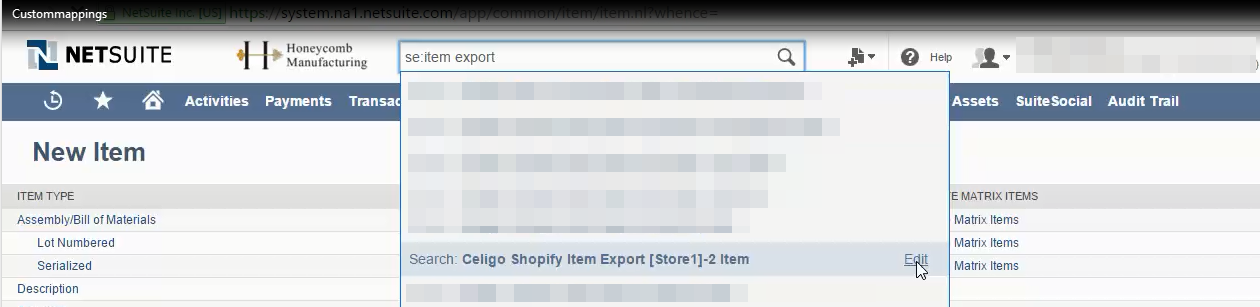
Go to the 'Results' section.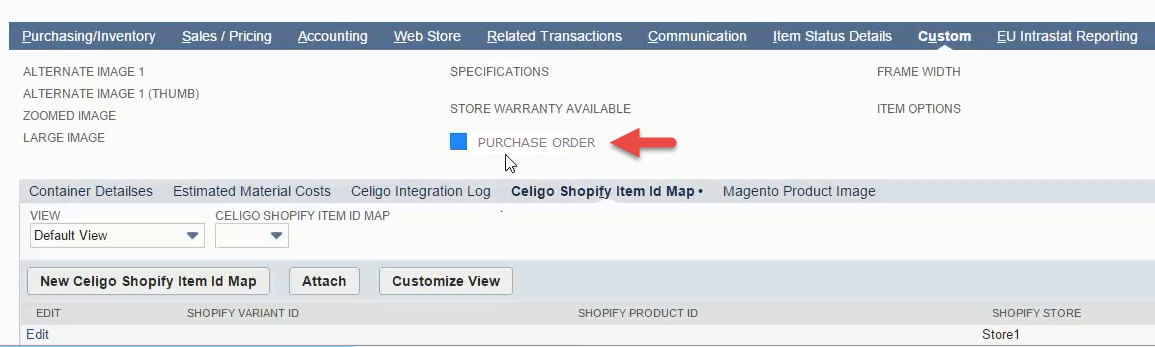
Add the additional field under the "Results" tab of the Saved Search. For example, if you need to map "Purchase Order" custom field in the below snapshot. Provide the corresponding label (right side row).
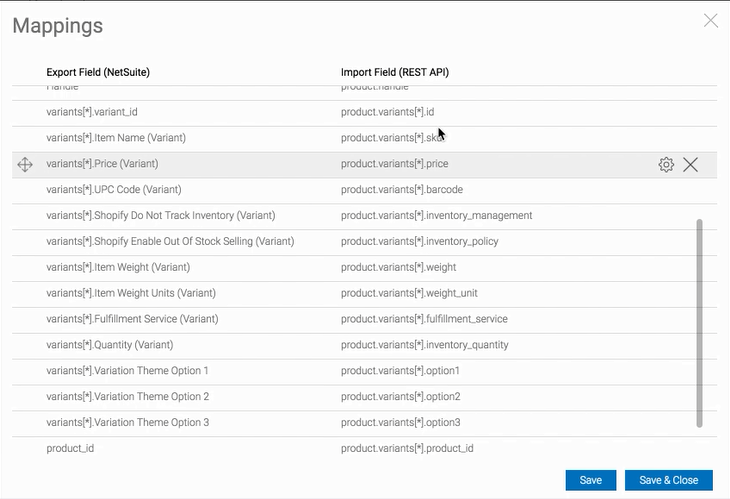
Note: If you want to add the mapping for the variant field, you will need to add variants[*]. as the prefix to the customer label. For example: if the field name is abcxyz shopify, update the label name as variants[*].abcxyz shopify [Variant].

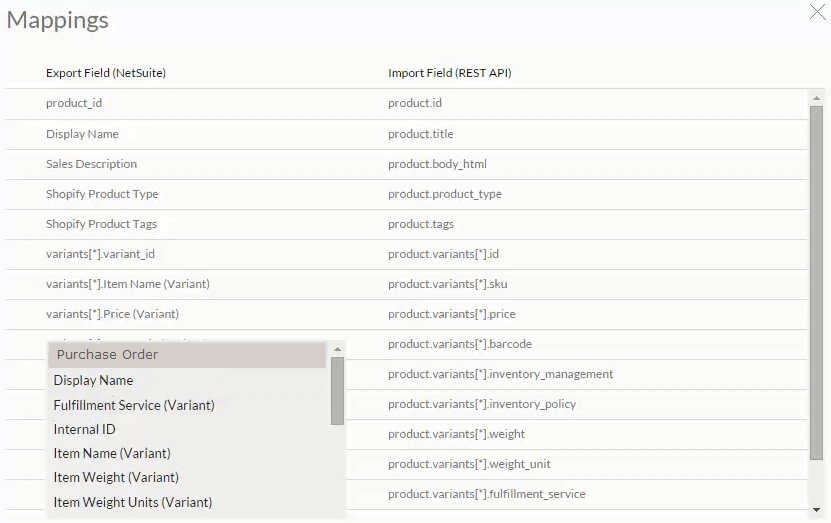
Now, go to the Integrator.io Product flow settings & edit the 'field mappings' for "NetSuite Item to Shopify Product Add/Update" data flow. 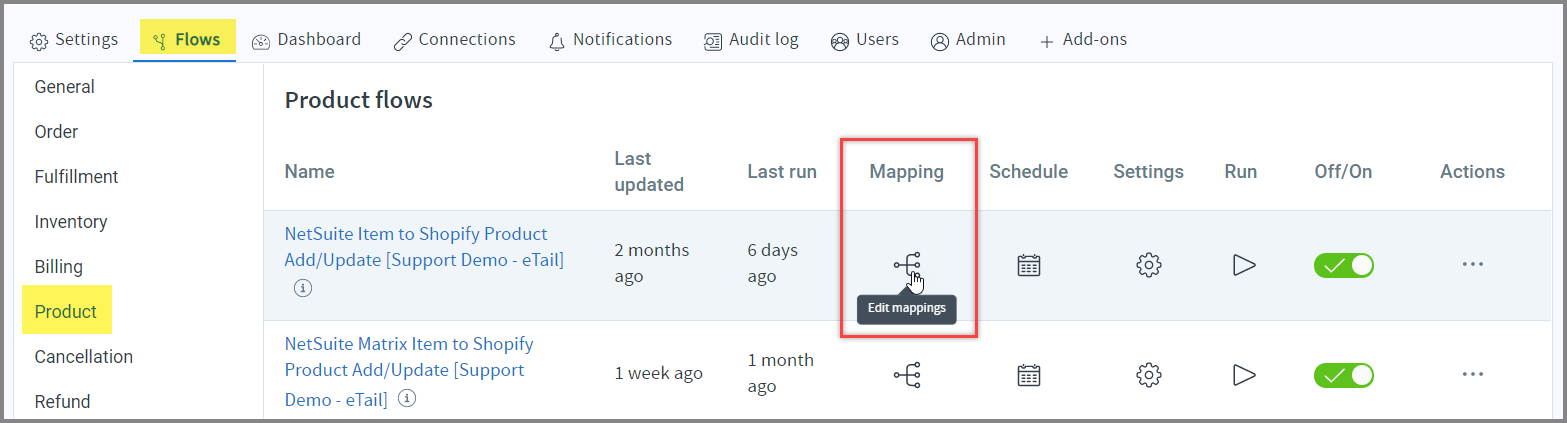
To add additional mappings, go to the bottom of the table and add additional rows. Just click into the row and enter the value or select the values from the list displayed.
Select "Purchase Order" in the Export Field.
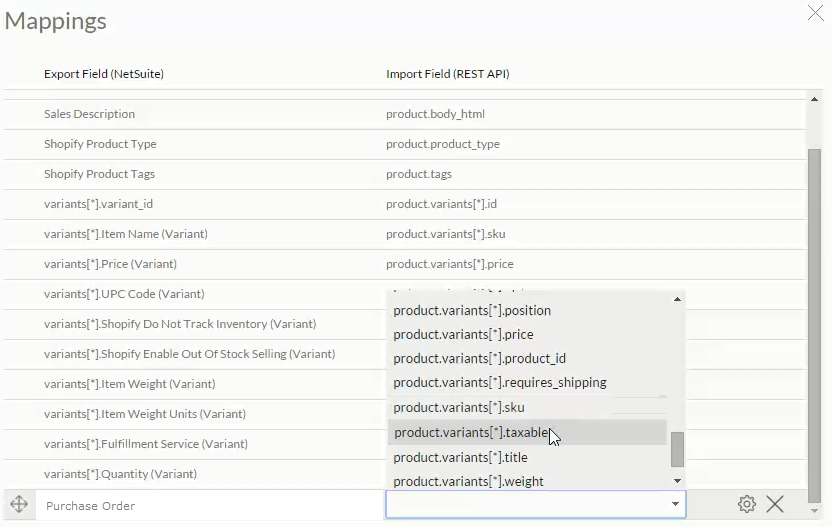
In the corresponding row, select the appropriate import field for Shopify Product (right column). Click in the row and select the value to be mapped (to the NetSuite Item field)
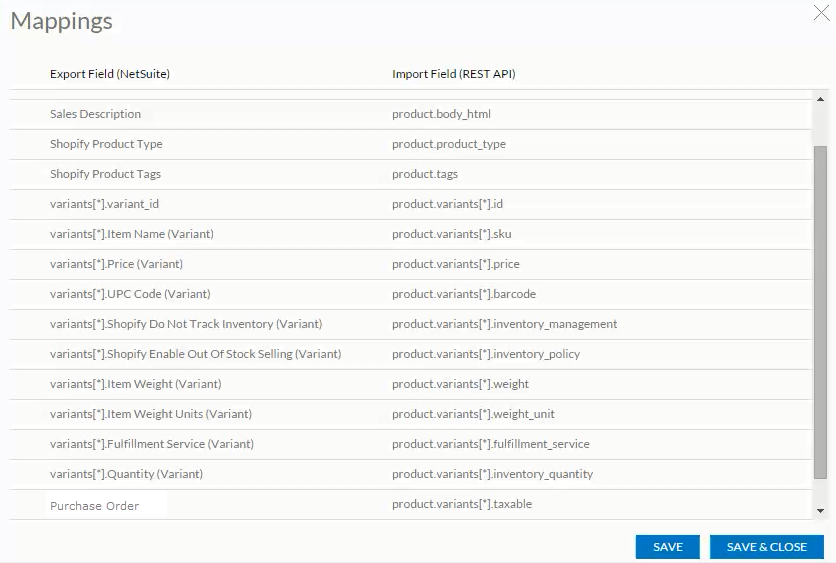
Save the mappings and go back to the data flow section from where you can run the flow and use the other control options.
Related Topics