Before you install
- Before installation, you must install the ZAB Bundle(Zone Advanced Billing [Zone&Co] 233521) in NetSuite.
- You need to create a real time export trigger (similar to what we are doing for the CPQ add-on).
-
You need to Create triggers:
- Log in to your Salesforce account.
- Select Object Manager.
- Got to Salesforce Account (lightning experience, click Object Manager
- Search in quick find sObject (Opportunity/Order/contract)
- Select triggers option from the left pane.
- Click on New to create a trigger.
- Use the following template and replace the placeholders with a unique name.
trigger <name> on <SobjectName> (after insert, after update){ integrator_da__.RealTimeExportResult res = integrator_da__.RealTimeExporter.processExport(); }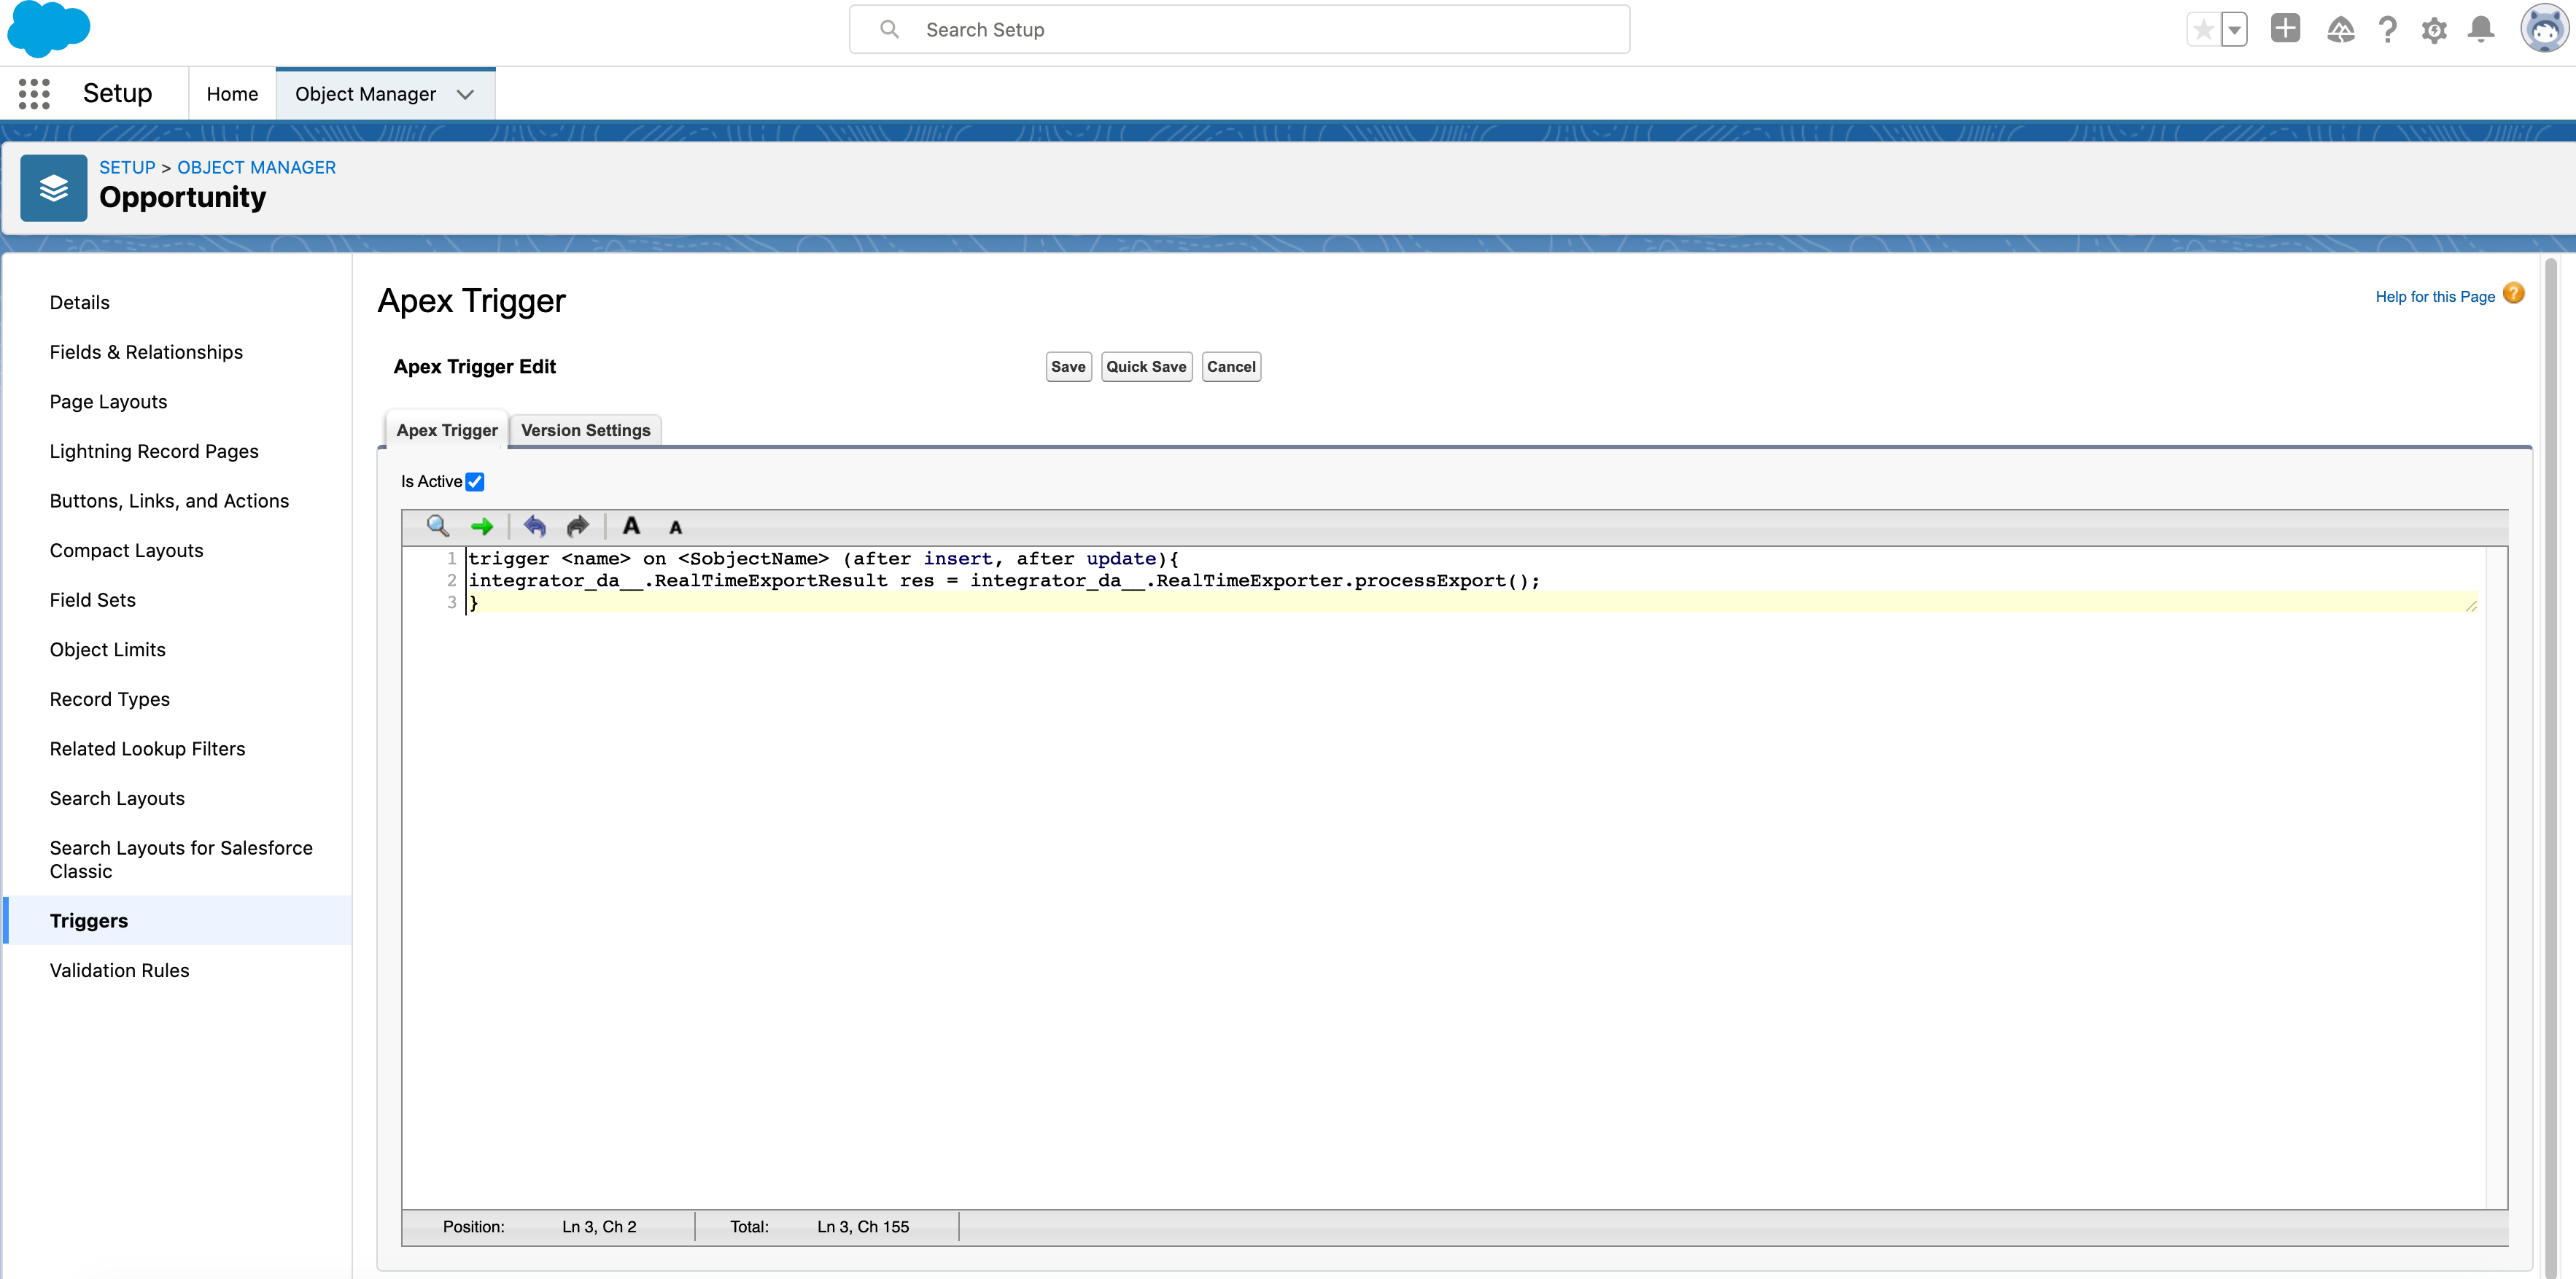
- Click Save.
-
You need to Create Custom Fields:
-
Field 1:
- Log in to your Salesforce account.
- Select Object Manager.
- Search for Fields & Relationships in the search box and select Fields & Relationships option from the left pane.
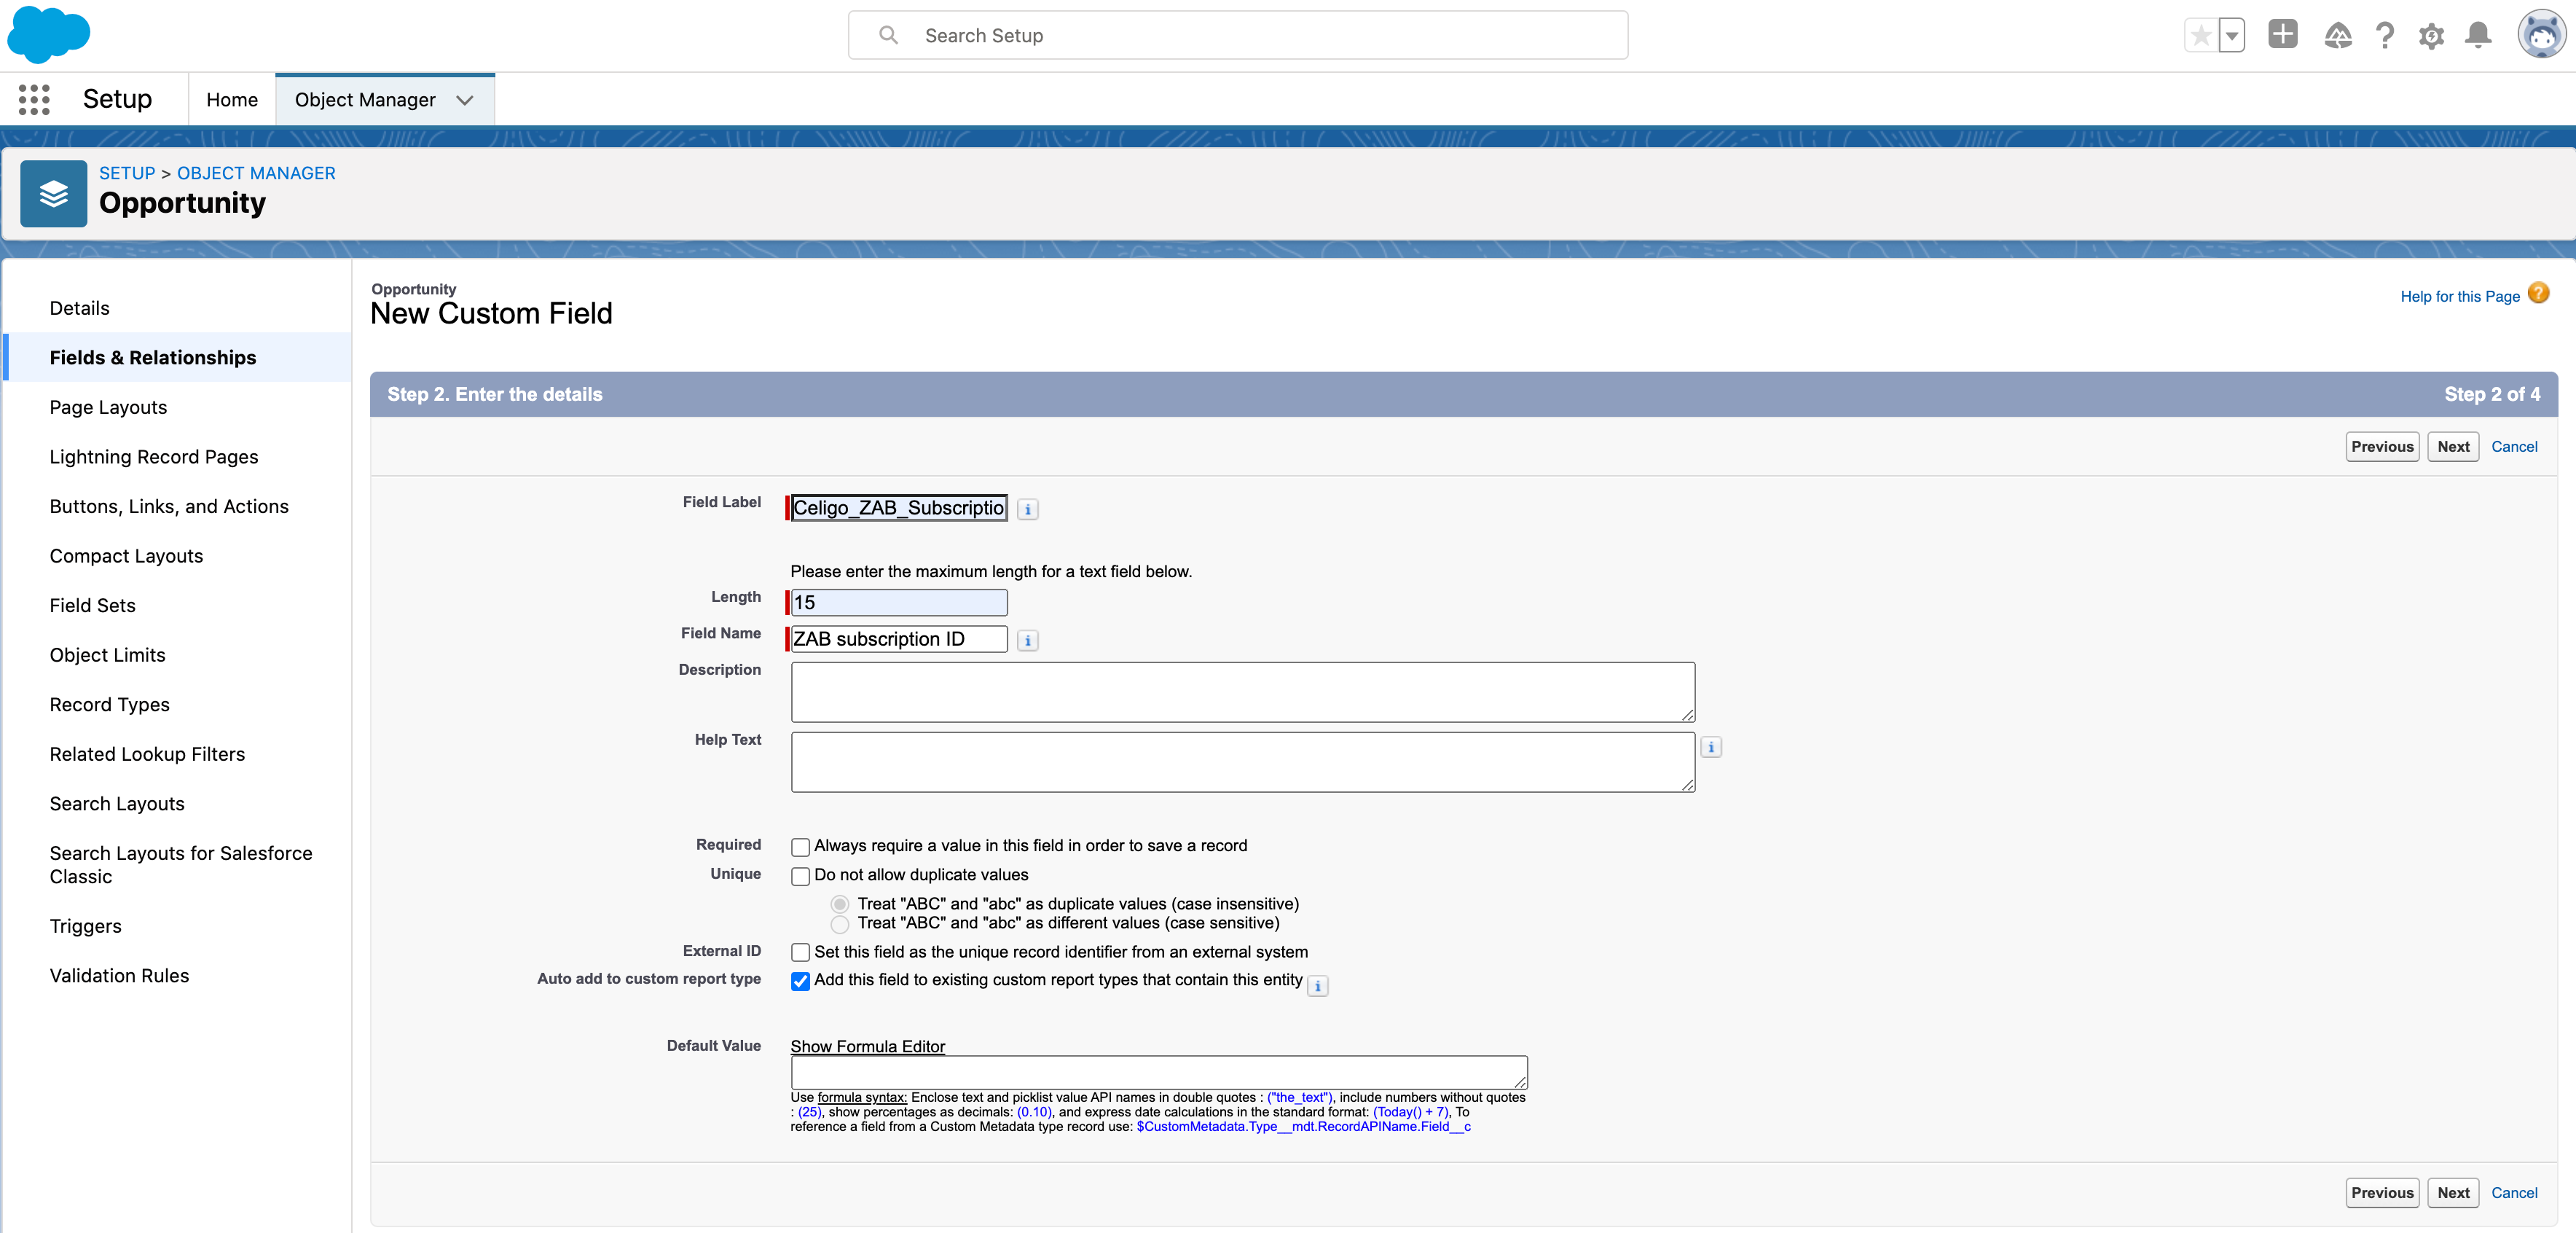
- Click on New to create a field.
- Select text radio button.
- Fill in the following mandatory details with the below value:
- Field Label : ZAB subscription ID
- Length: 15
- Field Name : Celigo_ZAB_Subscription_ID
-
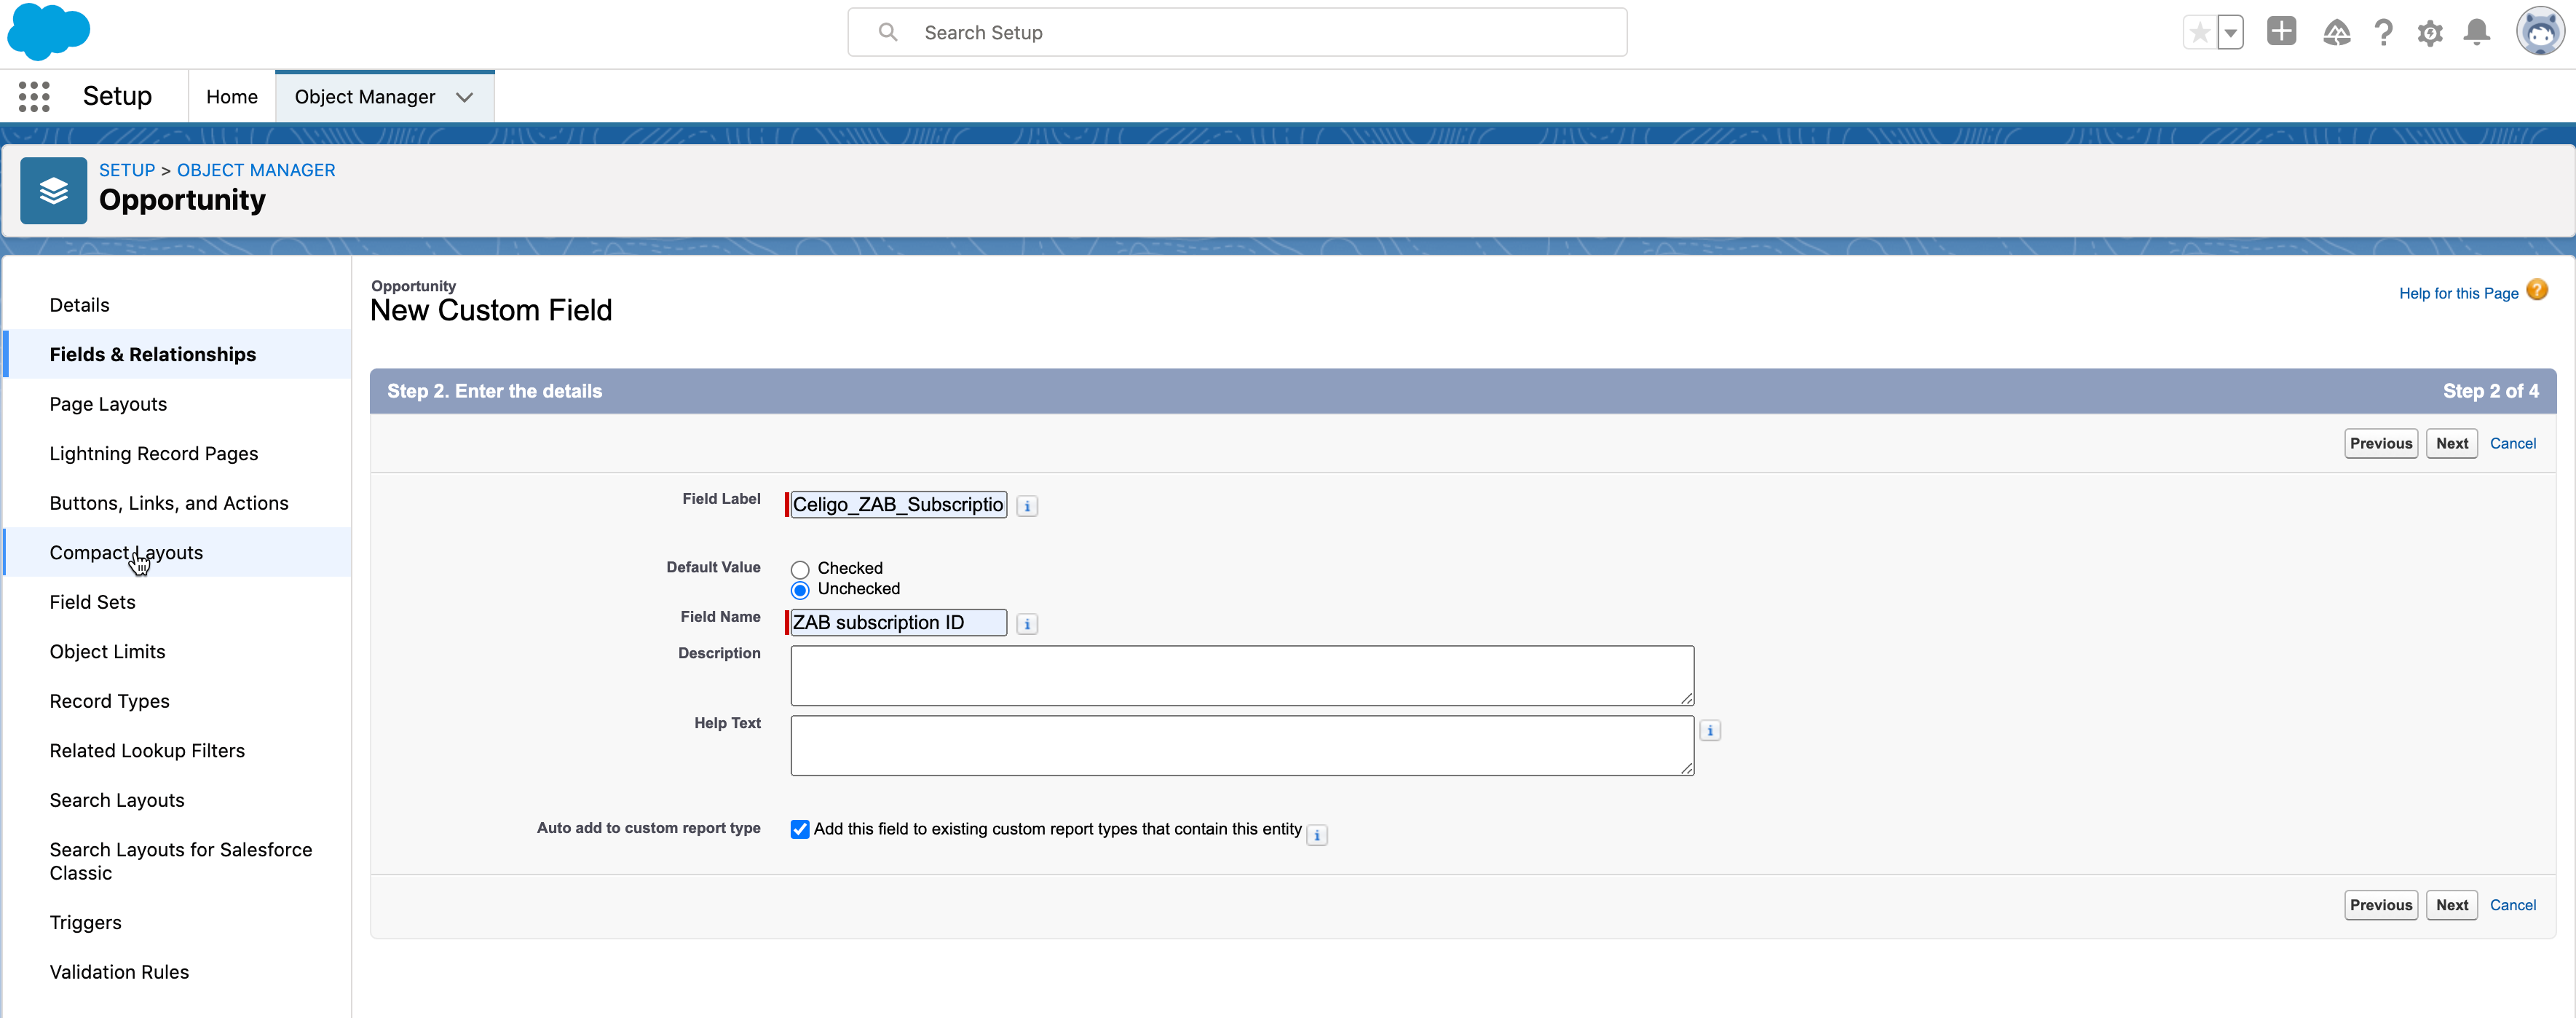
Field 2:
- Repeat the steps from 1 to 4 from the previous exercise.
- Select the checkbox radio button.
- Fill in the following mandatory details with the below value:
- Field Label : Celigo_ZAB_Skip_Export
- Default: Unchecked
- Field Name : Skip export to ZAB subscription
-
Create your Celigo iPaaS account
Sign up for an integrator.io account with administrative access.
Install Subscription to cash for Salesforce and Zone Advanced Billing template
Step 1: Install the template from the marketplace
- Sign up or Sign In into your integrator.io account.
- At the top, click Marketplace.
- Scroll through the catalog and search for Salesforce or NetSuite in the marketplace.
- Click on the Subscription to cash for Salesforce and Zone Advanced Billing tiles.
- Click Install from the Subscription to cash for Salesforce and Zone Advanced Billing quickstart integration template tile.
- The Install Wizard displays the list of components that it would create in your integrator.io account once the Subscription to cash for Salesforce and Zone Advanced Billing quickstart integration template is successfully installed.
- Set up and install Subscription to cash for Salesforce and Zone Advanced Billing quickstart integration template.
Step 2: NetSuite connection for Zone Advanced Billing
If you have already set up a connection to NetSuite, select it from the list. Otherwise, click Set up new connection and provide your NetSuite account credentials for basic authentication or token-type.
Click Configure to establish the NetSuite connection.
Click Save & close to test the connection and return to the template installation.
Step 3: Salesforce connection
If you have already set up a connection to Salesforce, select it from the list.
Click Configure to establish the Salesforce connection.
Click Save & close to test the connection and return to the template installation.
Step 3: Install Celigo integrator.io bundle
To install the Integrator Bundle in a NetSuite account, see Bundle installation.
Step 4: Install Celigo integrator.io adaptor package
The setup page tries to detect whether this integrator adaptor package is already installed with the Salesforce connection that you provided. If it cannot be confirmed, you are presented with the option to add the Salesforce template integration package, as described below:
- Select Click to install the template integration package. You’ll be redirected to your Salesforce Nonprofit app login page in a new browser instance.
- If you don’t currently have a Salesforce session in your browser, enter your username and password. Once signed into Salesforce, the page “Install Celigo integrator adaptor package” opens.
- Select the profile on which you want to install the package.
- Accept the acknowledgement (“I acknowledge that I’m installing a Non-Salesforce Application that is not authorized for distribution as part of the Salesforce’s AppExchange Partner Program”).
- Click Install for admins only.
- Click Done to install.
- Returning to integrator.io, click Verify Now.
Step 5: Copy resources now from template zip
Click Install to create all the three flows in your application.
Get started with the Quickstart template
Now that you’ve installed your Quickstart template in your integrator.io account, understand how to configure and run your flows:
- To familiarize yourself with the Integration tile refer to the article Understand how to use your integration tile.
- To know more about how to schedule or run a flow, refer to the article on Schedule or run data flows.
- To know how to use the flow dashboard, refer to the article Understand your dashboards.
- To understand template management, refer to Delete or restore a quickstart integration template.